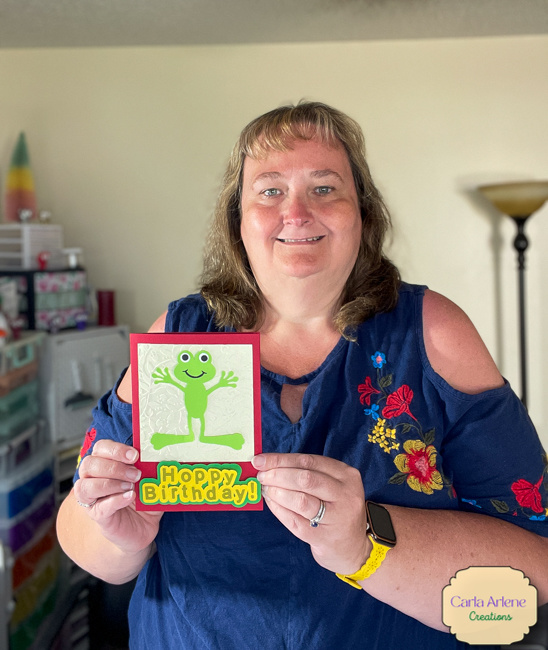
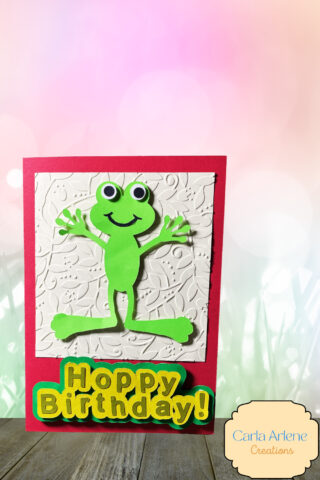
Hoppy Birthday Frog Card
There is frog hopping in to wish you a hoppy birthday. This cute frog card will be sure and brighten the day of the one who receives it, no matter the occasion. You can change up the wording and make this for a thinking of you card or even a get well card.
Note: This post may contain affiliate links for your convience, which means I may receive a commission, at no extra cost to you, if you make a purchase through a link. Please see my full disclosure for further information.
Homemade cards are fun to make and also great to receive as a little bit of the one who makes it goes into the colors and thoughtfulness of the card. Make this fun card using your Cricut and card stock and brighten someones day.
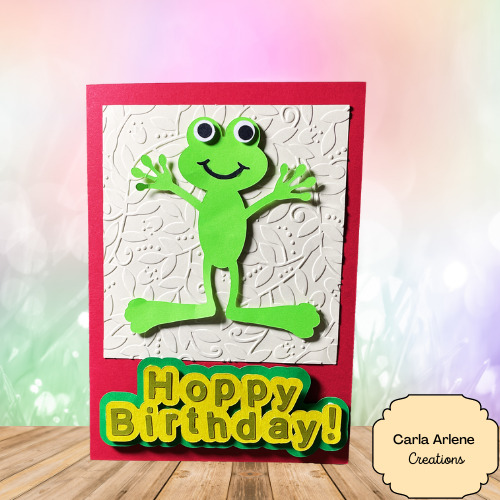
If you have an embossing machine and embossing folders you can give the card a little more detail by embossing the cream rectangle.
Materials Needed
Another project you can create with the frog is a cute shirt for a little one. Just add your own wording and you got a cute shirt.

HelP
- If you are not sure how to upload an SVG cut file to Cricut Design Space, please read this post How to Upload an SVG in Design Space

Hoppy Birthday Frog Card
Equipment
- Cricut Maker
- Brayer
- Standard Cutting Mat
- Spatula
- Scoring Wheel
Materials
- Cream Cardstock
- Dark Red Cardstock
- Light Green Cardstock
- Medium Green Cardstock
- Yellow Cardstock
- Dark Green Cardstock
- White Cardstock
- Black Cardstock
- Foam Dots/Strips
- Double Sided Tape
- Glue
Instructions
Cutting Out the Hoppy Birthday Frog Card
- Unzip the download file.
- Then open up Design Space and start a new project.
- Click Upload and find where you saved the unzipped version of the downloaded files for this project.
Then go into the SVG Folder and select the SVG Files

- Select all and

- next select the dotted line
- change from basic cut to score line
- then select the card and the score line
- and click on

- Then click on the Make It button
- The prepare screen will appear
- Now if everything looks correct on it, click on the continue button
The next screen will be where you will select the type of card stock you are using. If you do not see the material in your material favorites, click on "browse all materials" to find the weight of cardstock that you are using. For example the cream Cardstock I used is medium weight, you will need to select "Medium Weight"..
Once you have Design Space set, you are now ready to prepare your mat. I used a brayer when placing the Cardstock on the mat, this helps in making sure that the paper is adhered to the mat and will help in keeping the paper from ripping or moving when it is being cut.


Assembling the Hoppy Birthday Frog Card
- Starting with the card piece

- fold the card in half on the score line
- next take the cream rectangle

- if you have an embossing machine and folder that is spring related, then emboss this piece
- I used a leafy vine embossing folder to emboss mine
- then put double sided tape on the back of the cream rectangle and place on the front of the card (see photo below)
- next take the frog pieces

- using a pickup stick glue the blakc eye pieces on to the white eye pieces
- then take the mouth and put glue on the back and glue it on the frog's face
- then using foam dots place one on the back of each eye and place the eyes on the frog
- then using foam dots and strips put them on the back of the frog and place the frog in the middle of the cream rectangle
- next take the hoppy birthday wording pieces

- using glue and the pickup stick glue the top layer of letters on to the yellow layer center each letter
- then take foam dtos and put on the back of the yellow wording and and place it on top of the green wording
- then put foam dots/strips on the back of the green wording and place it on the card


Please Share Your Project!
I’d love to see what you create. Please share a photo in the comments below and on my Facebook Page or tag me on social media with @carlaarlenecreations
Happy Crafting!
Carla
Don’t forget to pin this for later!


One Comment